
Your first stop-motion correction
Open a clip, analyse it, compare the same frames, and save a corrected copy.
Before you begin: macOS 14+ · SDR video · no side larger than 4096 pixels
Follow the steps
Start with an appropriate copy.
Use SDR H.264 or HEVC in MOV/MP4, or SDR ProRes in MOV, where readable by macOS. HDR (HLG/PQ), protected media and oversized video are unsupported. Make an unprotected SDR Rec. 709 copy in your editor first if necessary. Keep your source. HDR support is planned for a future update; the current version requires SDR footage.
Open and analyse.
Choose Open Video… (⌘O) or drop a file into the window, then Detect scenes & analyse. For practice, Help → Open Demo Video opens the built-in sample. Wait for Analysis complete and note the scene count.
Check cuts before correction.
Click each scene band and inspect its beginning/end. Step with ←/→ around a suspected cut. Automatic detection uses the whole frame; a flash may need review. A target should not combine two different shots. Follow the scene-boundary guide for edits.
Compare the same source frame.
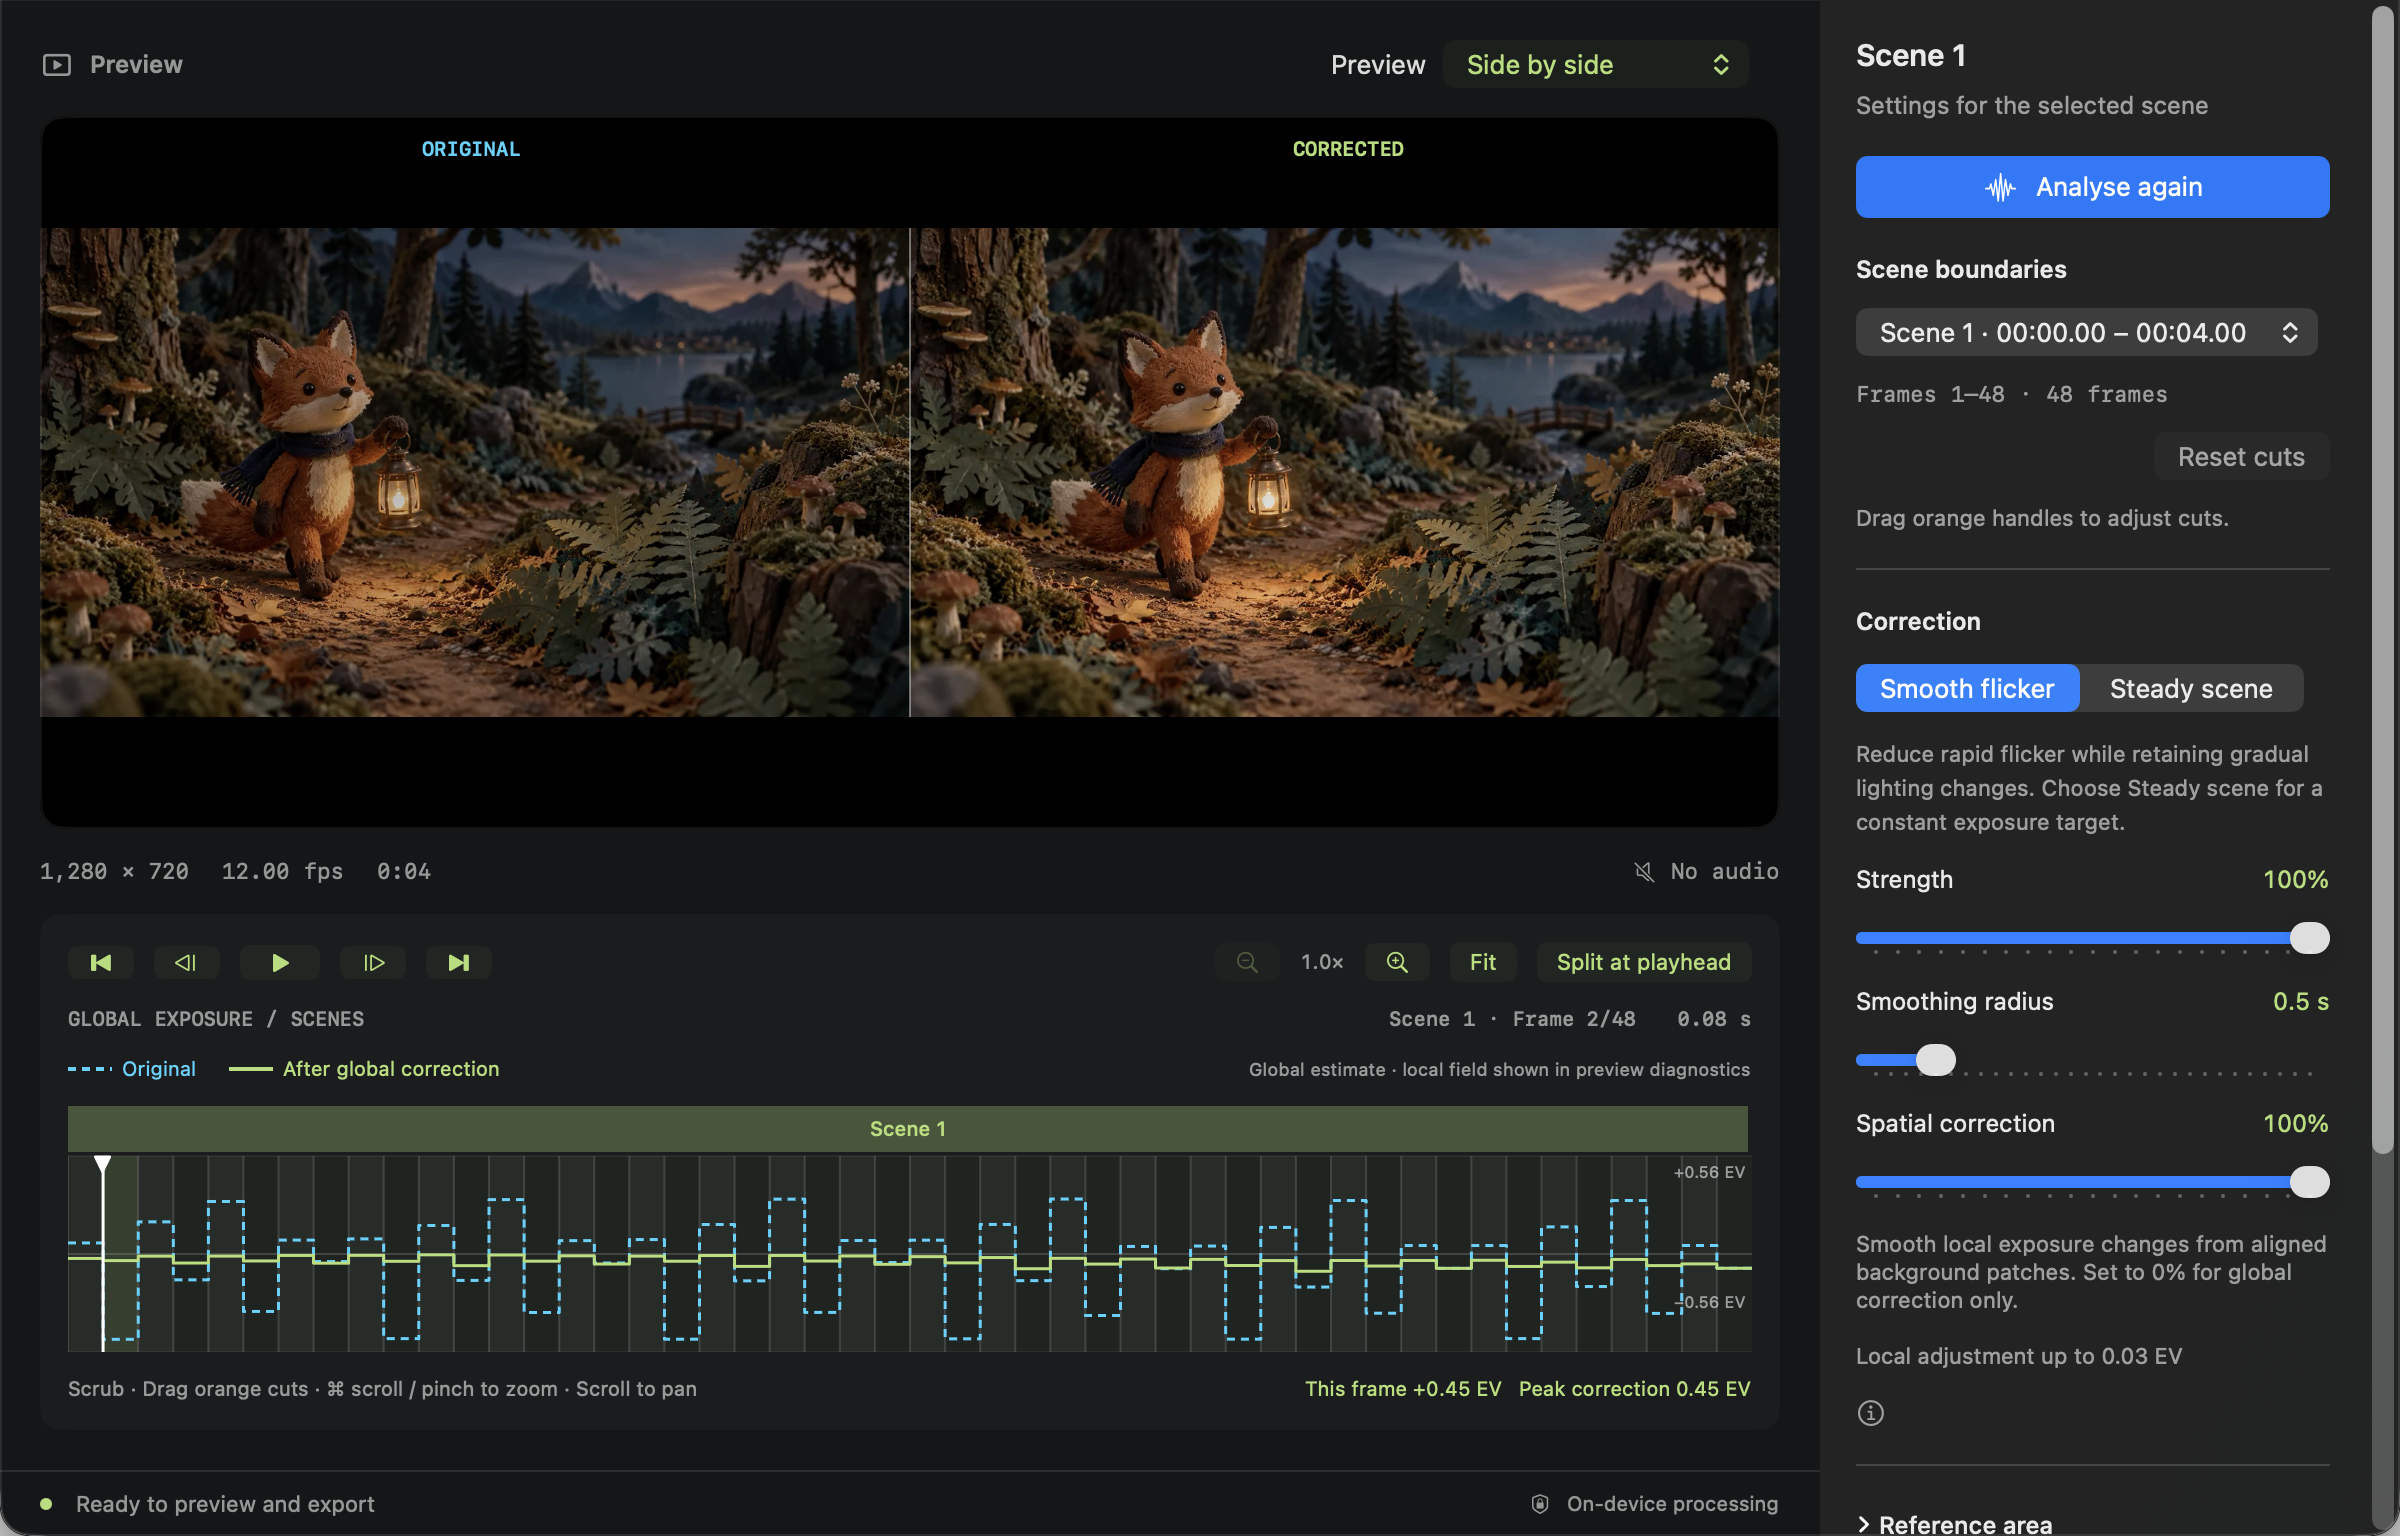
Choose Preview → Side by side: Original is left and Corrected is right. Both show the same decoded source frame. Use Space for playback, arrows for one-frame steps, and first/last buttons to inspect edges. The comparison view does not change exported dimensions or create a split-screen export.
Start with moderate adjustments.
Select a scene. Smooth flicker preserves gradual changes; start with a 0.5 s radius and adjust strength while comparing. Spatial correction controls local variation separately. Use a stable background reference when moving subjects dominate measurement. Set strength to zero if the scene should stay uncorrected.
Review the entire clip.
Watch at normal speed and step over difficult frames. Check shadows, highlights, camera movement and intentional fades. Improvements vary with usable background detail; exposure correction is not general colour grading or white-balance repair.
Export before ending the session.
Choose Export, a format/quality, and a destination. Open the saved result in a player and review it. Save Project (⌘S) keeps editable settings in a small .frankluma file. Keep the original video with it. Exporting a movie does not save the project; save both if you want a finished copy and an editable version.
Understand the exposure graph
Dashed cyan shows original exposure and solid green predicts exposure after global correction, on the same EV scale and scene baseline. Lines break at cuts. “This frame” is global correction in stops: positive brightens and negative darkens. Spatial adjustments appear in preview diagnostics. This graph is not a measurement of the encoded export.
Expected result and limits
You should have a separate corrected video and an untouched source. A static, consistent background gives the estimator stronger evidence; large camera moves, occlusions, clipped highlights and colour changes may leave residual variation. Do not increase strength merely to make a graph flat.