FrankLuma app iconFRANKLUMA / FOR MAC

Less flicker.
More of your story.

Reduce exposure flicker in stop-motion video.
Analyse each scene, fine-tune the correction, and compare the result—all on your Mac.

macOS 14+ · Apple silicon & IntelComing to the Mac App Store
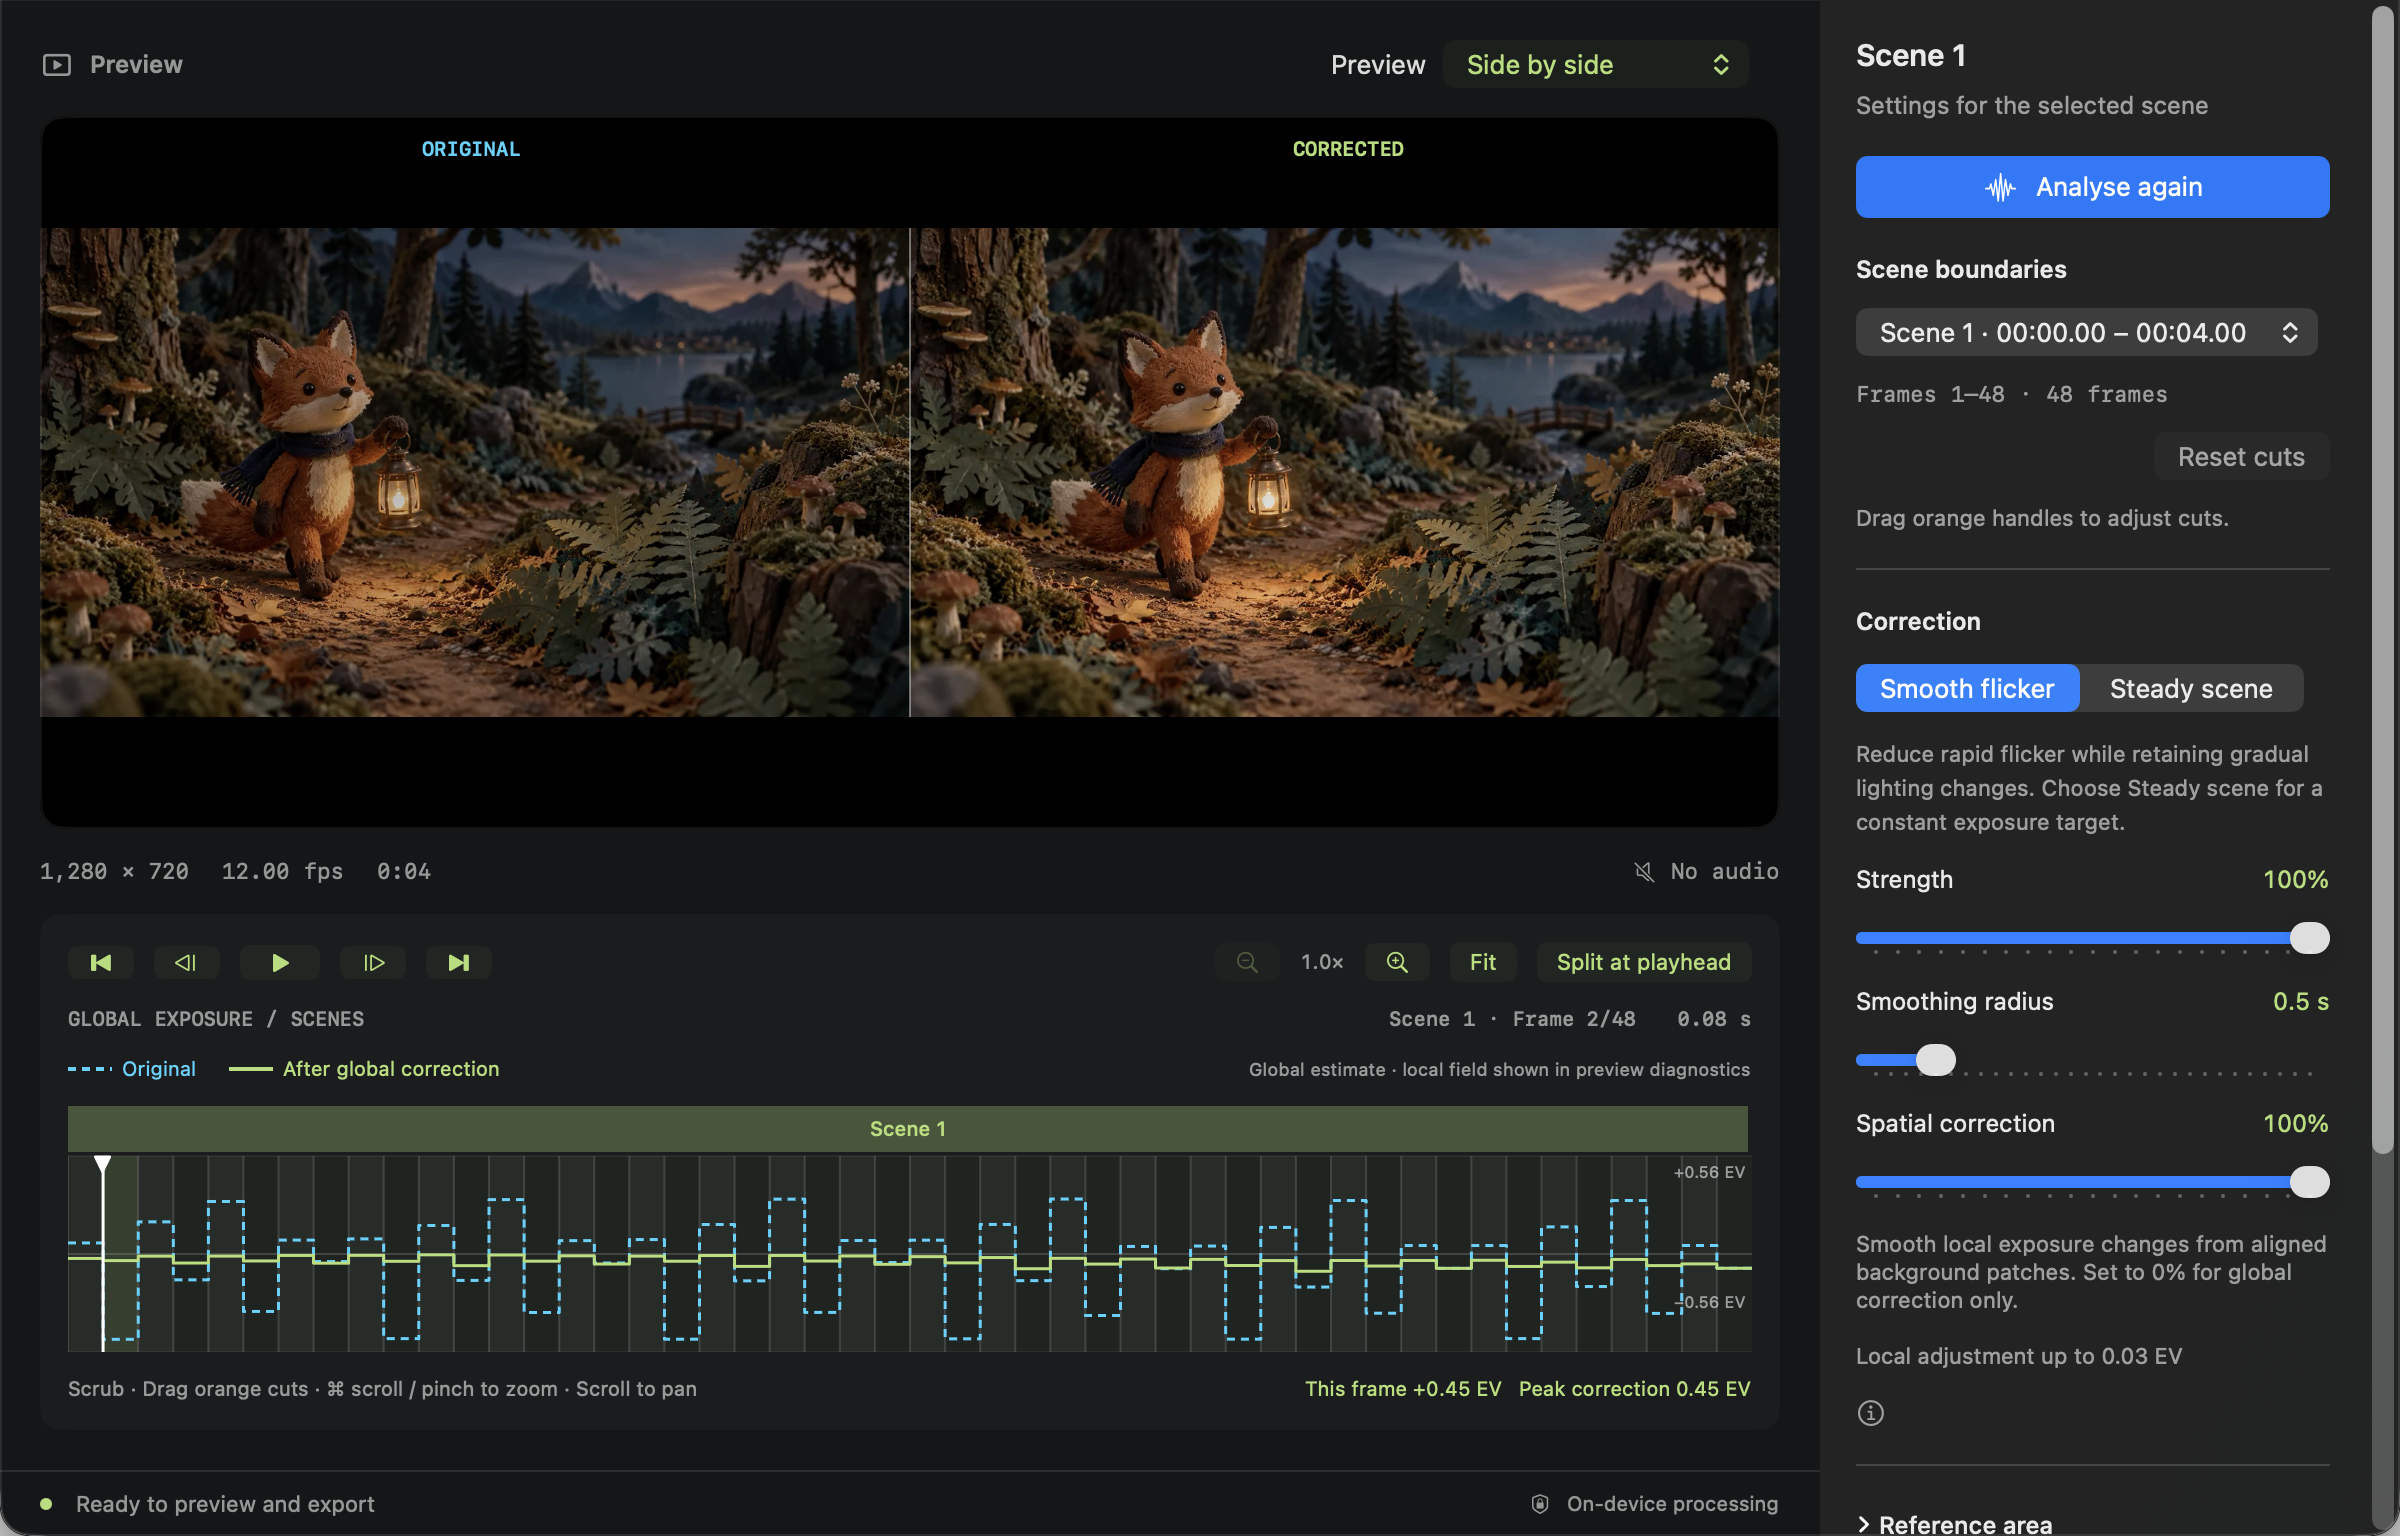
FrankLuma showing the lantern forest demo in Side by side, with scene settings and an exposure graph
The real FrankLuma workspace.AI-created scene · controlled exposure demo · actual app preview

See what changes.

Compare · Measure · Fine-tune
01 / COMPARE

One frame.
Both views.

Original on the left. Corrected on the right. Inspect the same source frame to judge how much correction feels right.

Actual FrankLuma preview using an AI-created still with deliberately varied exposure. This controlled demo illustrates the controls; results depend on your footage.

02 / MEASURE

Follow the light.

Scrub frame by frame and see where exposure fluctuates. The cyan line follows the source; the green line predicts exposure after global correction.

The graph shows the global estimate. Local corrections appear in preview diagnostics; it is not a measurement of the encoded export.

03 / FINE-TUNE

Let the background
set the reference.

When a moving subject changes the frame, select a background area whose lighting should stay consistent. Give each scene its own reference and settings.

Learn about reference areas →

Give each scene its own correction.

FrankLuma detects scene boundaries and measures exposure changes. Adjust cuts to the exact source frame, split at the playhead, or merge neighbouring scenes. Each scene keeps its own settings.

Keep a lighting change—or steady it.

Smooth flicker preserves gradual lighting changes. Steady scene uses a median exposure target within a scene and also reduces intentional fades. Control strength, smoothing radius, and spatial correction to suit your footage.

Measure the background.

Select a static reference area when moving subjects affect the exposure measurement. Compare Original, Corrected, or Side by side using the same source frame.

Open. Analyse. Compare. Export.

  1. Bring in a video.

    Open or drop an SDR video into FrankLuma. Try Help → Open Demo Video for a built-in sample.

  2. Find the right balance.

    Choose Detect scenes & analyse. Review cuts, adjust each scene, and step through the frames to check the correction.

  3. Keep a finished copy.

    Export a corrected MP4 or QuickTime movie. Your source stays untouched and processing stays local.

Follow the full guide →Browse step-by-step guides →

Keep your work ready for the next session.

Save scene cuts, correction settings, references and export choices in a small editable project. Reopen it to continue, and recover local checkpoints after an interruption.

Keep the original video with your project: media is linked, not copied.

Save, reopen and recover a project →
Know your footage.

FrankLuma supports SDR video readable by macOS, up to 4096 pixels on either side. Codec availability depends on macOS. Convert HDR or protected sources to an unprotected SDR Rec. 709 copy first.

Coming in a future update: HDR support is planned. The current version processes SDR video; no release date has been announced.

Export H.264 or HEVC in MP4/QuickTime, or ProRes 422 in QuickTime. QuickTime preserves compatible original audio; MP4 preserves AAC or converts other audio to AAC, with multichannel audio downmixed to stereo. Video is re-encoded, not lossless. Save editable settings in a .frankluma project, reopen the session, and relink its original video if it moves. Local checkpoints help recover unfinished work. Projects link the source; keep both files.

Correction depends on the footage. Camera movement, changing occlusions, colour instability, and clipped highlights can limit the result. Compare the preview and watch the exported movie before using it in your final edit.

Read how FrankLuma handles your files →