
Review and edit scene cuts
Separate different shots and keep correction settings independent.
Before you begin: An analysed clip
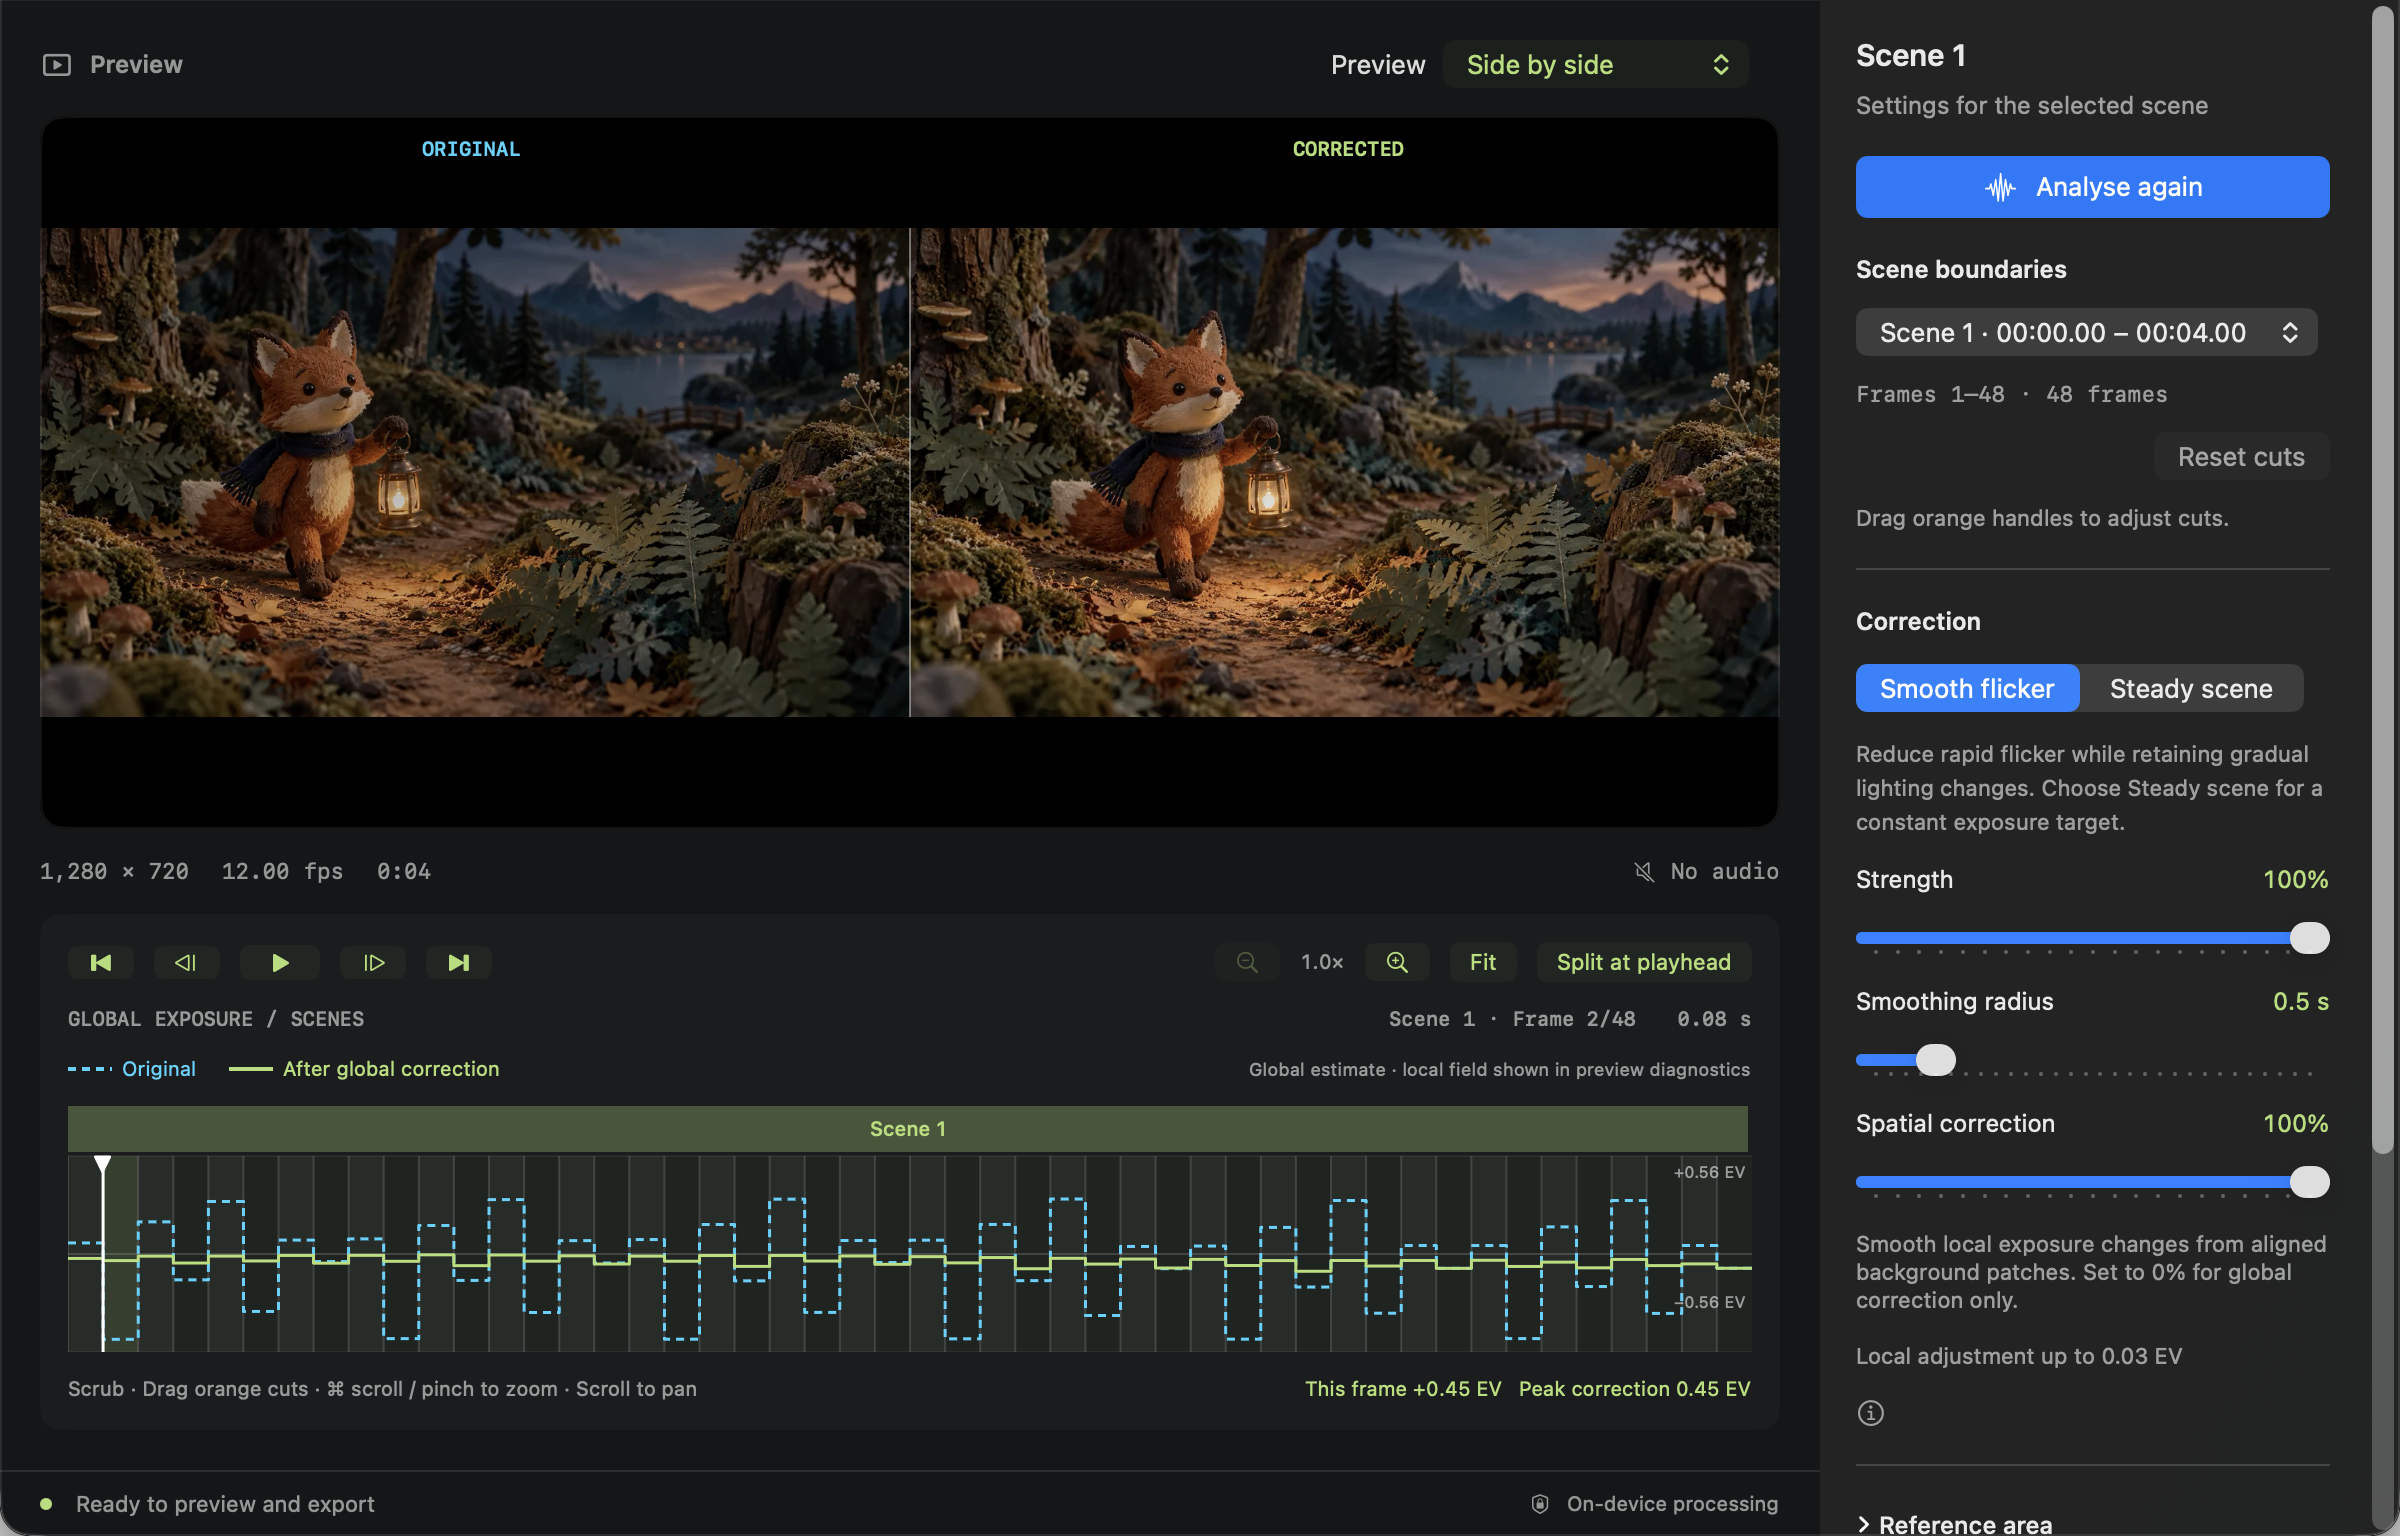
Follow the steps
Locate a boundary.
Choose a scene in the inspector or click its timeline band. Zoom near a cut with ⌘ + wheel, trackpad pinch, or magnifier buttons. Scroll/range slider pans; Fit restores the whole clip. At close zoom, slices represent actual source frames.
Find the first frame of the next shot.
Step one frame at a time. The preview, playhead and scene selection stay aligned. A boundary should sit immediately before the first frame that belongs to the next scene.
Adjust the orange cut.
Drag its handle; it snaps to source frames. Use inspector Start frame/End frame steppers as a precise keyboard alternative. Neighbouring boundaries cannot cross and every scene retains at least one frame.
Add or remove a cut.
Place the playhead at the frame that should begin a new scene and choose Split at playhead. The new scene inherits parent settings. To remove a boundary, select the later scene and choose Merge previous; the earlier scene’s settings win.
Review the resulting settings.
Select each affected band and compare its mode, strength, radius, spatial correction and reference. Settings remain per scene unless you choose Apply these settings to all scenes. That action copies mode, radius, strength and reference, so use it only when those measurements suit every shot.
Reset or analyse again when appropriate.
Reset cuts restores automatic positions and maps settings to the resulting scenes. Re-analysis preserves manual boundaries and settings when source frame timestamps are unchanged. Check each affected cut after either action, then export once the full clip is satisfactory.
Why scene boundaries matter
Targets and baselines stay within scenes. Combining different camera angles or lighting setups can produce an inappropriate target. A reference area measures exposure separately; selecting one does not detect or move cuts. Avoid creating many tiny scenes just to suppress a bad frame—first check the intended shot structure.
Frame numbers and timeline zoom
Click within a visible frame slice to select it. Holding ⌘ while scrolling zooms around the pointer; ordinary scrolling pans. Fit returns to the full duration. Inspector frame numbers are the UI numbering; diagnostic sample arrays may use zero-based indices, so include the visible frame number when asking for support.